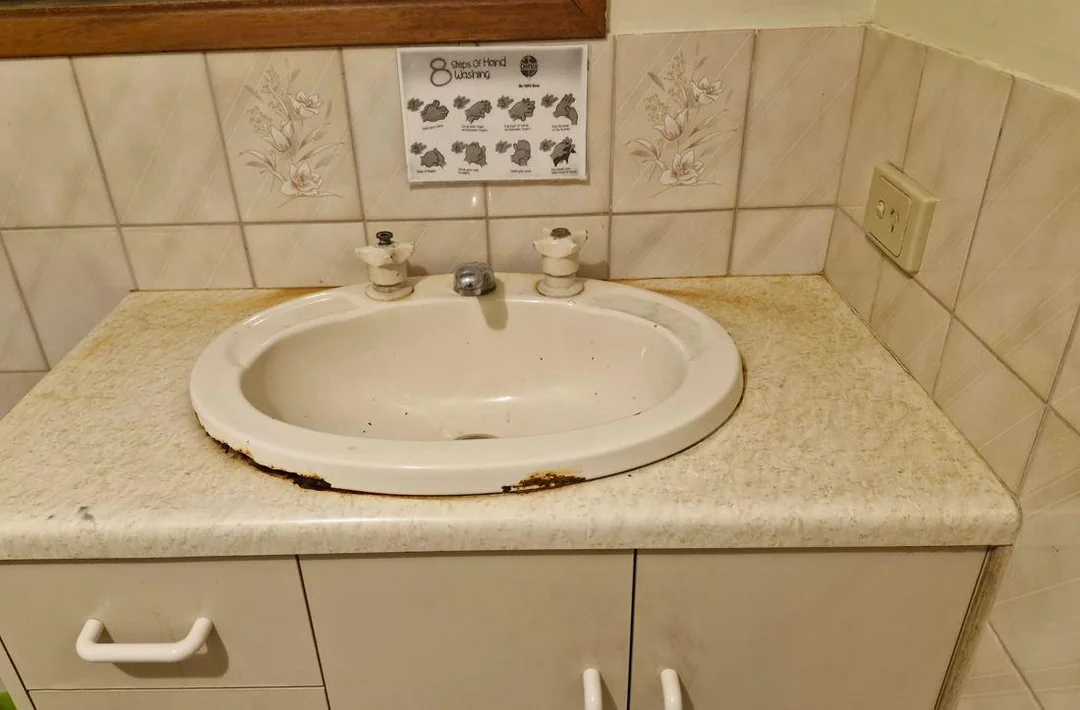
How To Replace A Bathroom Sink?

Replacing a bathroom sink might seem tough, but many people can do it themselves with the right tools and steps. Whether you’re changing the look of your bathroom or fixing a broken sink, this guide will help you through the whole process. You’ll learn to gather the needed materials, remove the old sink, and install the new one. Let’s start by making your bathroom look great with a new sink.
How To Replace A Bathroom Sink: Steps to Get Ready for a New Sink
Step 1: Turn Off the Water
- Find the water valves under the sink.
- Turn both hot and cold valves clockwise until they stop.
- Turn on the Faucet to drain the remaining water.
Step 2: Remove the P-trap
- If your P-trap is plastic, loosen the nut by hand. If it’s metal, use pliers.
- To clean the P-trap, unscrew it from the drain below.
Tip: Place a bucket or towel under the sink to catch any water.
Step 3: Disconnect the Water Lines
- Use a wrench to unscrew the valves’ hot and cold water lines.
- Some lines can be unscrewed by hand, but a wrench is often needed.
Tip: This is a good time to replace the old water lines if necessary.
Step 4: Measure the Old Sink
- Use a tape measure to note the old sink’s length, depth, and width.
- Measure the countertop space to make sure the new sink will fit.
Step 5: Buy a New Sink
- Take your measurements to a home improvement store.
- Make sure the new sink is the same type (top-mount or under-mount) as the old one.
- Ask for help at the store if needed.
Tip: Check that the new sink’s drain lines up with the old drain to avoid extra plumbing work.
How to Replace a Top-Mount Sink
Step 1: Remove the Clips
- Look under the sink for clips that hold it to the countertop.
- Loosen these clips with your hands or a screwdriver.
Tip: Keep the clips in case you need them for the new sink.
Step 2: Cut the Sealant
- Use a utility knife to cut through the sink and countertop sealant.
- Carefully run the knife around the edge of the sink to break the seal.
Step 3: Lift Out the Old Sink
- Grab the sink from above and lift it out of the countertop.
- If it’s too heavy, ask someone to help by pushing it up from below.
Step 4: Clean the Area
- Scrape off any leftover sealant from the countertop with a plastic putty knife.
- Clean the area with a rag dipped in mineral spirits to remove any residue.
Step 5: Install the Faucet and Drain
- Decide if you want to reuse the old Faucet and drain or get new ones.
- Follow the instructions to install the Faucet and drain on the new sink.
Step 6: Put Caulk on the Sink
- Apply a line of silicone caulk around the underside of the new Sink’s Sink’s rim. This will help keep the sink in place and stop water from leaking.
Tip: Use silicone caulk made for bathrooms. Don’t use other types of caulk.
Step 7: Place the Sink on the Countertop
- Carefully lower the sink into the hole in the countertop.
- Once it’s in place, press down on the sink and wipe off any extra caulk with paper towels.
Step 8: Secure the Sink
- Attach the sink to the countertop using the clips that came with your new sink.
- Follow the instructions to place and tighten the clips by hand or with a screwdriver. These clips will hold the sink in place.
Step 9: Seal the Sink Rim
- Apply a silicone caulk line around the sink’s edge where it meets the countertop. This will create a waterproof seal.
- Smooth the caulk with a wet finger and wipe away any extra with damp paper towels.
Replacing an Undermount Sink
Step 1: Cut the Caulk
- Use a utility knife to cut the caulk that holds the sink to the countertop.
- Be careful not to scratch the countertop as you work around the sink’s edge.
Step 2: Remove the Clips
- Have someone hold the sink from below.
- Remove the clips under the sink that secure it to the countertop. Use a screwdriver for screws or a putty knife for glued clips.
Tip: Make sure the sink is supported to prevent it from falling.
Step 3: Lower the Sink
- Once the cask and clips are removed, lower the sink and remove it from the cabinet.
Tip: If you’re reusing the Faucet and drain, take them off now. Otherwise, you can install new ones later.
Step 4: Install the Faucet
- Attach the Faucet to the new sink before you install the sink under the countertop.
Step 5: Apply Silicone Caulk
- Put a continuous silicone caulk line around the new sink’s top edge. This will help secure it and prevent leaks.
Step 6: Position the Sink with Clamps
- Cut a piece of 2×4 wood to be a bit longer than the sink opening.
- Place the wood across the opening and use a bar clamp through the sink’s drain hole to hold it up from below. Tighten the clamp until some caulk squeezes out, then wipe away the excess.
Step 7: Attach the Clips
- Secure the sink with the clips that came with it. Use screws or epoxy as instructed by the manufacturer.
Step 8: Wait and Install the Drain
- Wait 24 hours for the caulk to fully cure before removing the clamp and wood.
- After the caulk sets, install the drain and finish the setup.
Finishing Up and Testing Your New Sink
Step 1: Let the Caulk Dry
- After putting in the top-mount sink, let the silicone caulk dry for 24 hours. This keeps the sink steady and the seal strong.
- For undermount sinks, you should have already waited 24 hours before adding the drain. Now you can move on.
Step 2: Reconnect Water Lines and P-Trap
- Reattach the hot and cold water lines to the valves. If necessary, tighten them by hand or with a wrench.
- Reconnect the P-trap under the Sink. Use your hands for a PVC P-trap or pliers for a metal one.
Tip: If the new drain is shorter, get a P-trap extension and cut it to size. If it’s too long, trim the pipe with a hacksaw.
Step 3: Turn on the Water and Check for Leaks
- Open the hot and cold water valves by turning them counterclockwise.
- Turn on both faucet taps and let the water run for 2-3 minutes.
- Look under the sink for any leaks in the water lines or pipes. Tighten any loose parts.
Tip: Keep a bucket or towel under the sink while checking for leaks.
Bonus: If you find a leak, turn off the water, take apart the connection, wrap the plumber’s tape around the threads, and reconnect. If the leaks continue, you might need to call a plumber.
How Much Does It Cost to Replace a Bathroom Sink?
Replacing a bathroom sink involves some costs. Here’s an easy breakdown of what you might spend:
Cost of the Sink
- Basic Sinks: These Cost between $40 and $150. They are usually simple and made of materials like porcelain or stainless steel.
- Mid-Range Sinks: These are priced between $150 and $600. They have better designs and might be made from ceramic or glass.
- High-End Sinks: These can cost from $600 to over $1,800. They are made from high-quality materials like natural stone or designer ceramics and look very stylish.
Installation Costs
- DIY Installation: If you can install the sink yourself, you save money on labour costs. This can be $0 if you have the necessary tools and skills.
- Professional Installation: If you hire a plumber, it usually costs between $100 and $600. This ensures the sink is installed correctly and without any problems.
Additional Costs
- New Faucet and Drain: If you need a new faucet and drain, it will cost between $50 and $300.
- Plumbing Supplies: You might need some extra supplies like silicone caulk and plumber’s tape, costing around $20 to $50.
Example Cost Scenarios
Budget Replacement
- Basic sink: $50
- DIY Installation: $0
- Total Cost: $50
Mid-Range Replacement with Professional Help
- Mid-Range sink: $300
- Professional Installation: $250
- New Faucet and Plumbing Supplies: $100
- Total Cost: $650
Luxury Replacement
- High-End sink: $1,000
- Professional Installation: $500
- New Faucet and Plumbing Supplies: $200
- Total Cost: $1,700
Tips for a Cost-Effective Replacement
- Compare Prices: Look at different stores and online shops to find the best deals.
- Look for Sales: Watch for sales at home improvement stores.
- Consider Labor Costs: If you’re not sure about installing it yourself, hire a professional to avoid mistakes.
How Long to Replace a Bathroom Sink
Replacing a bathroom sink is a task you can usually complete in a few hours. Here’s a simple breakdown:
Preparing (30-60 minutes)
- Turn Off Water: Find and turn off the water valves under the sink.
- Disconnect Plumbing: Use a wrench to disconnect the water lines and P-trap.
- Remove Old Sink: Cut any caulk holding the sink to the countertop and lift the sink out.
Installing the New Sink (60-90 minutes)
- Position the New Sink: Lower the new sink into the hole in the countertop.
- Apply Caulk: Put a silicone caulk line around the sink’s edge.
- Secure with Clips or Clamps: Attach any clips or clamps to hold the sink in place.
Reconnecting Plumbing (30-60 minutes)
- Reconnect Water Lines: Attach the hot and cold water lines to the new Faucet and tighten them.
- Reattach the P-trap: Connect the P-trap to the sink drain and tighten the fittings.
Final Checks (30 minutes)
- Check for Leaks: Turn the water back on and run the Faucet for a few minutes to check for leaks.
- Let caulk Dry: If it’s a top-mount sink, let the caulk dry for 24 hours before using the sink heavily.
How to Replace a Bathroom Sink Stopper
Replacing a bathroom sink stopper is easy. Just follow these steps:
What You Need
- New Sink Stopper: Make sure it fits your sink.
- Wrench: To disconnect plumbing parts.
- Towel: To catch water and debris.
Steps to Replace Your Sink Stopper:
Step 1: Get Ready
- Turn Off the Water: Close the water valves under the sink.
- Remove Old Stopper: Twist the old stopper counterclockwise to take it out. If it’s connected to a rod, you may need to disconnect the Rod first.
- Clean the Drain: Wipe away any dirt around the drain with a towel.
Step 2: Install the New Stopper
- Put in the New Stopper: Twist the new stopper clockwise to fit it in. For rod-connected stoppers, insert the Rod into the new stopper and adjust it as needed.
- Reconnect the Rod (if applicable): Attach the Rod back to the lever under the sink.
- Test the Stopper: Turn the water back on and check if the stopper works by pushing it up and down.
Helpful Tips
- Read Instructions: Follow the instructions that come with your new stopper.
- Take Your Time: Make sure everything is done correctly.
- Check for Leaks: After you’re done, look for any leaks around the new stopper.
How Much Does it Cost To Replace A Bathroom Sink Faucet?
Replacing a bathroom sink faucet usually costs between $230 and $680. This includes the Cost of the Faucet and the labour if you hire someone to install it.
Faucet Cost
- Basic faucets cost between $50 and $150.
- Mid-range faucets cost between $150 and $300.
- High-end faucets can cost up to $600 or more.
Labor Cost
- Hiring a professional to install the Faucet typically costs between $130 and $350.
Extra Supplies
- You might need to spend $20 to $50 on things like connectors and fittings.
Example Costs
Basic Replacement
- Basic Faucet: $100
- Labor: $150
- Total: $250
Mid-Range Replacement
- Mid-Range Faucet: $200
- Labor: $200
- Supplies: $30
- Total: $430
High-End Replacement
- High-End Faucet: $500
- Labor: $300
- Supplies: $50
- Total: $850
Tips to Save Money
- Compare prices from different stores.
- Look for sales and discounts.
- Install the Faucet yourself, if you can, to save on labour costs.
Recommendation
How to Remove Bathroom Mirror?
What Is A Jack And Jill Bathroom?
How To Clean Bathroom Fan: A Easy Step By Step Guide
Why Your Toilet Won’t Flush? Main Causes And Solutions
Conclusion
In conclusion, replacing a bathroom sink might seem challenging, but with the right tools and steps, it’s a task many can handle on their own. By following this guide, you can easily remove the old sink and install a new one. Whether you’re upgrading your bathroom’s look or fixing a broken sink, the process is straightforward. You can save money by doing it yourself or hire a professional to ensure the job is done quickly and correctly. Either way, with a bit of time and effort, you’ll have a refreshed bathroom with a new sink that fits perfectly.
FAQs
Q: Can I replace a bathroom sink myself?
A: Installing a bathroom sink can be simple enough to do on your own without needing to hire an expensive plumber. This guide will walk you through the basic plumbing steps, which should work for most sink installations. So just follow the steps written above in the article.
Q: Are bathroom sinks hard to replace?
A: Installing a bathroom sink may seem like a big task, but if you’re good with tools, you can do it yourself in a few hours, especially with some help. If you’d rather skip the work, you can hire a professional to install the sink for you, making it quicker and easier.
Q: How do you measure bathroom sink size?
A: If you’re replacing your sink with the same style, just measure the length, width, and depth of your current sink and pick a new one with the same size. If you’re choosing a different style, measure the length and width of the opening in your vanity and the depth of your old sink.
Q: Which is better for a bathroom sink?
A: Even though ceramic sinks can resist water, they still absorb some, which can weaken them over time. Porcelain sinks are less porous than ceramic, making them a better water-resistant choice.


