
How To Install A New Toilet?
Installing a new toilet might seem tricky, but with the right tools and instructions, it’s a project you can handle. Whether you’re updating an old model, replacing a broken toilet, or just want to improve your bathroom, knowing the steps for installation can save you time and money. In this guide, we’ll walk you through the entire process, from gathering the materials you need to making final adjustments, so you can install your new toilet smoothly and efficiently.
Things You Need To Know Before Toilet Installation
Before you start installing a new toilet, it’s good to know about its parts and the different types available. This knowledge will make the installation process smoother and help you make informed choices.
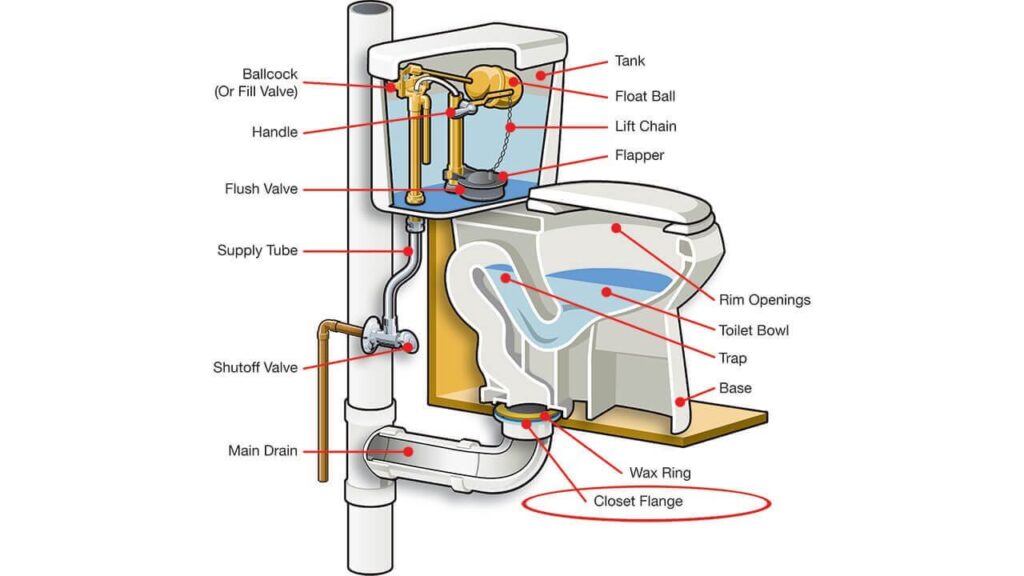
Parts of a Toilet
- Bowl: The lower part that sits on the floor and holds the seat.
- Tank: The upper part mounted on the bowl that stores water for flushing.
Other Important Components
- Closet bolts: Hold the toilet in place on the floor.
- Fill valve: Refills the tank after you flush.
- Flapper: Regulates the water flow from the tank to the bowl during a flush.
- Flush valve: Releases water from the tank into the bowl.
- Supply line: Connects the toilet to your home’s water supply.
- Wax ring: Creates a watertight seal between the toilet and the floor.
Different Types of Toilets
When choosing a toilet for your home, think about the size of your bathroom, how much water you want to save, and what you personally like. Here are a few types you can consider:
- Two-Piece Toilets: These are the standard ones, with a separate tank and bowl.
- One-Piece Toilets: These look sleek and modern, with the tank and bowl combined into one unit.
- Wall-Mounted Toilets: These save floor space by hiding the tank inside the wall, giving a clean look.
- Dual-Flush Toilets: These have two flush options to save water—using less for liquid waste and more for solid waste.
Each type has its own benefits, so choose the one that best suits your needs and bathroom layout.
Tools and Materials Needed for Installing a Toilet
To install a toilet, you’ll need the following tools and materials:
- Adjustable wrench
- Brass washers
- Closet bolts
- Electric drill
- Hacksaw
- Level
- New toilet
- Plumber’s tape
- Putty knife
- PVC cement
- PVC primer
- Screwdriver
- Stainless steel screws
- Supply line
- Tape measure
- Wax ring
Safety Tips
When installing a toilet, keep these safety tips in mind:
- Make sure the room is well-ventilated when using adhesives or solvents.
- Keep the area clean and dry to avoid slips and falls.
- Turn off the water supply before you start.
- Lift the toilet properly, as it can be heavy.
- Wear gloves to protect your hands.
How To Install a Toilet?
Removing The Old Toilet
If you’re going to replace your toilet, the first step is removing the old one. Here’s a simple guide:
- Turn off the Water: Find the shut-off valve near the toilet, either on the wall or floor, and turn it off.
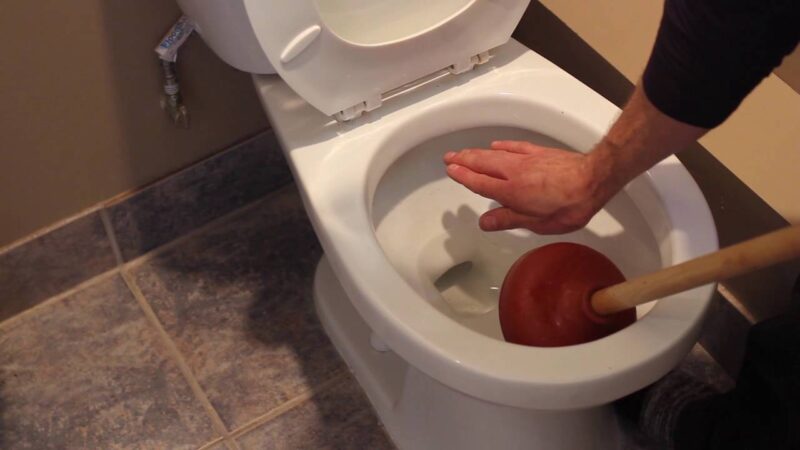
- Drain the Toilet: Flush the toilet to empty the tank and bowl. Use a plunger to push out any remaining water. Wear rubber gloves and use a sponge and bucket to remove any leftover water from the tank.
- Disconnect the Supply Line: Use an adjustable wrench to disconnect the water supply line. If it’s stuck, apply some heavy-duty lubricant to loosen it.
- Be Ready for Leaks: Have a bucket and rag nearby to catch any water that drips from the supply line.
- Separate the Tank and Bowl (if working alone): It’s easier to handle the tank and bowl separately if you’re alone.
Removing the Tank
- Remove Tank Bolts: Use an adjustable wrench to take out the bolts connecting the tank to the bowl.
- Lift the Tank: Lift the tank straight up and set it aside.
Removing the Bowl
- Remove Bolt Caps: Pop open the toilet bolt caps, using a screwdriver if needed.
- Remove Nuts and Washers: Use pliers or an adjustable wrench to take off the nuts and washers securing the bowl to the floor. If they’re rusted, apply heavy-duty lubricant and use a hacksaw if necessary.
- Cut Through Caulk: If there’s a caulk around the base, use a utility knife to cut through it.
- Loosen the Bowl: Gently rock the toilet bowl back and forth until it’s loose. Lift it and set it aside to expose the old toilet seal.
- Remove Old Seal: Use a putty knife to remove the old seal. Clean up any residue with a damp rag or sponge.
- Block the Drain: Place a rag in the open drain to stop sewer gases from escaping. Remember to remove the rag before installing the new toilet.
Getting the Bathroom Floor Ready
Before installing your new toilet, it’s important to check the subfloor and closet flange to ensure they’re in good condition. This helps prevent leaks and provides a stable base for the toilet.
Checking the Subfloor
- Look for Damage: Check the area around the drain for any water damage or rot. Fix any issues before moving forward, which might mean replacing damaged flooring or reinforcing the subfloor.
- Block Sewer Gas: Put a rag into the soil pipe to block sewer gas and prevent anything from falling in.
- Check Hole Size: Ensure the hole in the floor is big enough for the closet flange. If needed, trace around the flange with a pencil and cut away extra flooring with a hacksaw, avoiding any joists.
- Dry-Fit Pipe: Test fit the soil pipe into the closet bend, place the flange over it, and measure the gap between the flange collar and the floor.
- Trim Pipe: Cut the soil pipe to the right length using a handsaw and smooth the cut edge with a utility knife.
Installing the Closet Flange
The closet flange connects your toilet to the drain pipe. Follow these steps to install or replace it:
- Prime and Cement: Apply PVC primer inside the closet bend and outside one end of the soil pipe. Then, add PVC cement and quickly twist the soil pipe into the closet bend.
- Attach Flange: Prime and cement the other end of the soil pipe and inside the closet flange. Twist and press the flange onto the soil pipe until the collar sits on the floor.
- Align Flange: Rotate the flange so the slots for the bolts are parallel to the wall behind the tank.
- Secure Flange: Use stainless steel screws to fix the flange collar securely to the floor.
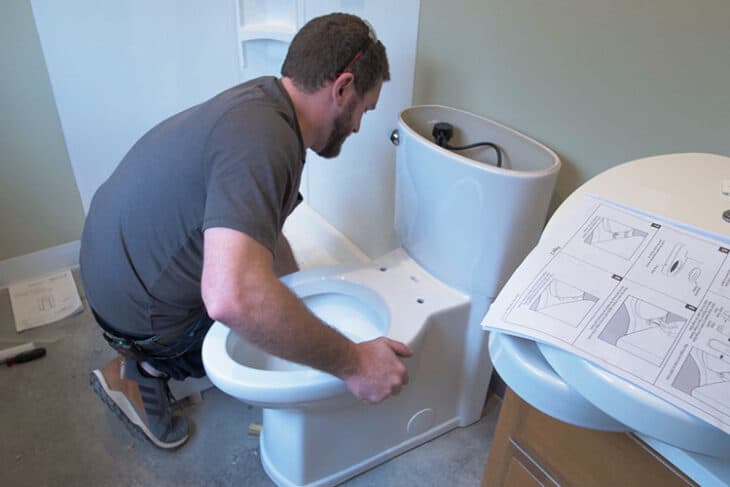
Setting Up the New Toilet Bowl
With the floor ready, you can now install the new toilet bowl by placing the wax ring and securing the bowl.
Placing the Wax Ring
- Insert Bolts: Put the long brass closet bolts, threaded end up, into the slots in the flange collar. Add a brass washer to each.
- Position Wax Ring: Press the wax ring, flat side down, over the flange.
- Align Bowl: Lift the toilet bowl over the flange and align the holes in its base with the bolts, then lower it onto the wax ring.
Securing the Bowl
- Set Bowl: Carefully lower the bowl onto the flange, aligning the base holes with the bolts.
- Create Seal: Press down firmly on the bowl to compress the wax ring and create a watertight seal.
- Secure with Washers and Nuts: Place washers and nuts on the bolts and tighten them alternately until the bowl is secure. Avoid overtightening to prevent cracks.
- Trim Excess Bolts: Use a hacksaw to trim any excess bolt length and snap on the decorative caps.
Attaching the Toilet Tank
Once you’ve securely installed the toilet bowl, the next step is to attach the tank and its parts. This involves connecting the tank to the bowl and setting up the flushing mechanism.
Connecting the Tank to the Bowl
- Place the Gasket: Put the large rubber gasket on the bottom of the tank, around the opening for the flush valve.
- Lower the Tank: Carefully place the tank onto the bowl, making sure the holes for the bolts are aligned.
- Insert the Bolts: Push the bolts through the holes and secure them from underneath with washers and nuts.
- Tighten Evenly: Tighten the nuts evenly, alternating between them to keep the tank level and secure.
Setting Up the Flush Mechanism
- Install Valves: Follow the instructions provided to install the fill valve and flush valve.
- Attach the Flapper Chain: Connect the flapper chain to the flush lever and adjust its length as needed for proper flushing.
- Connect the Water Supply: Attach the water supply line to the fill valve, using plumber’s tape on the threads to prevent leaks.
Connecting the Water Supply and Testing
After you’ve put together your toilet, the final steps are to connect the water supply and check for leaks.
Attaching the Supply Line
- Connect to Shut-Off Valve: Use the plumber’s tape on the supply line threads and connect it to the shut-off valve.
- Tighten Connections: Hand-tighten the connections, then use an adjustable wrench to give them an extra quarter turn.
- Turn on the Water Supply: Slowly turn on the water supply and let the tank fill.
Checking for Leaks
- Spot Leaks: Place a dry cloth or paper towel around the base of the toilet tank to spot any small leaks.
- Flush and Inspect: Once the tank is full, flush the toilet and carefully inspect all connections for leaks.
- Check the Base: Look for any water seeping out from the base, which could mean the wax ring isn’t sealed properly.
- Fix Leaks: If you find any leaks, tighten the connections or adjust the toilet as needed.
Fixing Common Toilet Installation Issues
Even if you’re careful, you might run into some problems while installing your toilet. Here’s how to handle them:
Fixing Uneven Floors
If your bathroom floor is not level, the toilet might wobble. To fix this:
- Level the Toilet: Place plastic shims or washers under the toilet base to level it.
- Trim the Shims: Cut the shims with a utility knife so they are flush with the toilet base.
- Apply Caulk: Caulk around the base of the toilet to cover the shims and create a clean finish.
Stabilizing a Wobbly Toilet
A toilet that rocks can break the wax ring and cause leaks. To stabilize it:
- Tighten Bolts: Gently tighten the closet bolts, switching between them to avoid uneven pressure.
- Add Shims: Insert extra shims where needed to stop the toilet from moving.
- Secure the Toilet: Make sure the toilet is level and stable before fully securing it.
Keeping Your New Toilet in Great Shape
Regular maintenance will keep your toilet working well and help prevent problems. Here are some simple tips:
Regular Cleaning
- Clean the Bowl and Tank: Use a gentle cleaner to regularly clean the toilet bowl and tank.
- Scrub Thoroughly: Use a toilet brush to scrub the bowl, focusing on the rim and under the lip.
- Wipe the Exterior: Wipe down the outside of the toilet, including the base and behind the tank, to keep it free of dust and grime.
Replacing Parts When Needed
Some parts of the toilet might wear out over time and need to be replaced:
- Flapper Valve: If the toilet keeps running or doesn’t flush properly, it might be time to replace the flapper valve.
- Fill Valve: If the tank doesn’t fill correctly or makes strange noises, you may need a new fill valve.
- Wax Ring: If you see water around the base of the toilet, the wax ring might need replacing.
Cost of Toilet Installation in the USA
The cost of installing a toilet can vary based on the type of toilet, the complexity of the installation, and where you live. Here are some general cost estimates:
Average Costs
- Standard Toilet Installation: Usually costs between $224 and $533.
- One-Piece Toilet: Typically ranges from $250 to $600.
- Two-Piece Toilet: Generally costs between $100 and $300.
Factors Affecting the Cost
- Location: Prices can differ based on your city or state. Installation costs might be higher in large cities compared to smaller towns.
- Additional Work: Extra tasks such as removing an old toilet, tiling, or other construction work are usually not included in the basic price and can add to the total cost.
- Labour Charges: The cost can vary depending on the plumber’s experience and the specific job requirements. More experienced plumbers might charge more.
- Type of Toilet: Costs can differ based on whether you choose a standard, tankless, or designer toilet. A standard toilet might cost between $100 to $450, while a designer toilet could range from $1,000 to $3,000.
Additional Costs
- Removing an Old Toilet: If you need to remove an old toilet, this can add another $50 to $150 to the total cost.
- Supplies: Basic installation supplies like a wax ring, water supply line, flush lever, and fittings might cost an extra $15 to $17.
Toilet Flange Installation Diagram
Recommendation
Best Toilets Of 2025: Things To Consider Before Buying Toilet
Why Japanese Toilets Are the Best: The Evolution of Japanese Toilets
The Importance and Versatility of Toilet Paper Holders
How to Install a Toilet Paper Holder
Flush Valve Seal Replacement: A Simple Guide to Fixing a Running Toilet
How to Replace a Toilet Flapper: A Simple Guide to Fixing Leaks and Saving Water
Japanese Bidet Toilets: The Ultimate Guide to Comfort and Hygiene
Conclusion
In conclusion, installing a new toilet is an easy task if you have the right tools and know what to do. Understanding the parts of the toilet, the types available, and the steps for installation will make the process much easier. By following the instructions carefully, from removing the old toilet to setting up the new one, you can avoid common problems and get the job done right. Regular cleaning and quick repairs will help keep your toilet working well. No matter which toilet you choose, this guide has all the information you need for a successful installation.
FAQs
Q: How much should installing a toilet cost?
A: The average cost for a homeowner in the U.S. to install a toilet is around $374. However, the total cost can range from $224 to $533 depending on factors like location, materials, size, and type of toilet.
Q: Which toilet is easier to install?
A: If you like the convenience of a two-piece toilet for easier installation and repairs, we liked this model from Kohler. We installed it ourselves, and it only took about an hour to follow the instructions.
Q: How heavy is a toilet?
A: The weight of a toilet can differ based on its material, design, and size. Generally, a standard toilet weighs between 35 and 90 pounds (15 to 41 kilograms). However, some toilets might weigh more or less than this range.
Q: What is a GPF toilet?
A: Gallons per flush (gpf) is a way to measure how much water, in gallons, is used to flush a toilet or urinal.
