What To Do When Your Whirlpool washer stuck on sensing?

Have you ever found your Whirlpool washer stuck on sensing, thinking it was smoothly doing its job, only to realize it’s not moving forward in the wash cycle? Don’t worry, it happens more than you think. In this easy-to-follow guide, we’ll talk about this common hiccup specific to Whirlpool washers and help you fix it without any tech stress. We’ll keep it simple and walk you through easy troubleshooting steps so you can get your Whirlpool washing machine back on track in no time. Let’s dive in and make laundry day a breeze with your Whirlpool washer.
What Is The Sensing Cycle
Have you ever wondered why your washing machine seems to take a break during the sensing cycle? Well, that’s the moment your washer is figuring out just how much water it needs to clean your clothes—pretty smart, right? It’s all about saving water. But if your machine gets stuck here, it puts a pause on moving to the next steps of the washing cycle. Don’t worry, though! In this guide, we’ll break it down for you in simple terms and give you easy steps to fix it. Let’s get your washing machine back on track so you can smoothly sail through the rest of your laundry.
Is it Normal When The Sensing Light is Flashing
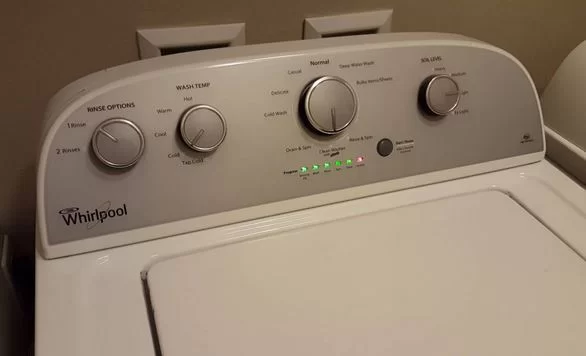
When you kick off your Whirlpool washer with the knob on ‘auto-sensing,’ you’ll spot the sensing light flashing. That’s just the machine doing some quick, slow spins to figure out how much laundry you’ve got. Usually, this sensing light only flashes for a short time if everything’s working fine. So, no worries—it’s just your washer being smart about your laundry load.
How To Fix A Whirlpool Washer Stuck on The Sensing Mode
Feeling frustrated because your Whirlpool washer decided to take a break and got stuck on sensing during the sensing phase? No worries – fixing it is usually quick and easy, just a few minutes of your time. First, try giving your Whirlpool washer a break by resetting it. If that doesn’t do the trick, check your Whirlpool washer settings. Still not working? Don’t worry. We’ll also look at the water inlet valve.
I’ll walk you through each step so you can troubleshoot and get your Whirlpool washer back in action hassle-free.
Give Your Washer a Fresh Start
When your washer is acting up, a quick fix to try is giving it a reset. Just turn off the machine using the control panel, unplug it, and wait a few minutes before plugging it back in. Think of it like rebooting your home computer – it often helps clear any confusion in the machine’s brain.
Double-Check Your Wash Settings
Sometimes, the solution is simpler than you think. If your washer is stuck during the sensing cycle, make sure you have avoided accidentally picking the wrong settings. Take a look, make any necessary adjustments, and see if that does the trick.
Inspect the Water Inlet Valve
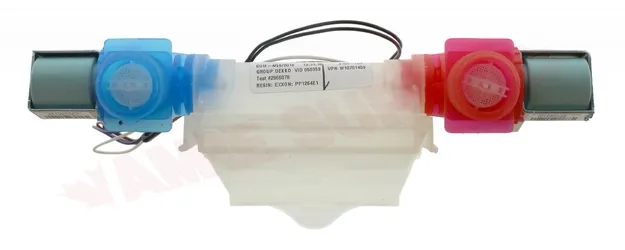
If the first two steps don’t do the trick and your washer is still stuck on sensing, it’s time to look a bit deeper. The water inlet valve could be causing the issue. Check if it’s opening and closing properly. If it’s not, it might be preventing enough water from getting into the machine, causing a prolonged sensing cycle. Fixing this could be the key to getting your washer back on track.

To ascertain if the inlet valve is working correctly, the most reliable approach involves conducting a test with a multimeter, similar to the one depicted here.
How to Test the Water Inlet Valve
You’ll need a multimeter and a screwdriver to check if your washing machine’s water inlet valve is working properly. Before you start, make sure your machine is unplugged to stay safe.
Here’s what you do:
- Use the screwdriver to remove the top console of your Whirlpool washing machine.
- Look for a plastic part with two wires – your water inlet valve (refer to the inlet valve image above).
- Disconnect the wires and take out the inlet valve.
- Grab your multimeter and set it to the lowest resistance setting. Connect its leads to the valve’s terminals.
- The valve should show some resistance (it’s like a little hurdle for the electricity).
- If your multimeter reads 0 ohms or infinity, it means the water inlet valve is not doing its job and needs replacing.
If you’re interested in learning how to replace a malfunctioning water inlet valve, take a look at the video below. It’s a relatively simple repair component, something a skilled person can manage at home.
Faulty Shift Actuator
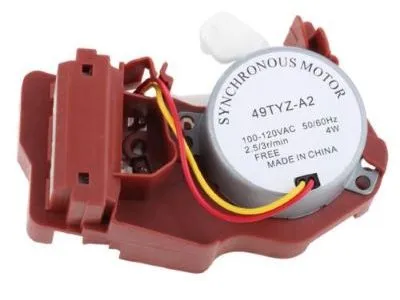
The shift actuator is like the eyes of your washing machine, helping it move smoothly between different tasks. But if it’s acting up, your machine might get stuck in one job, especially during the sensing phase. No worries, though – you can fix this by swapping out the shift actuator for a new one.
Here are some signs that your shift actuator might be causing trouble:
- Cycle stuck: If your washing machine doesn’t budge from one cycle, that could mean the shift sensor needs attention.
- Can’t switch cycles: Even if you try to pick a different cycle, your machine might not listen.
- Error messages: Keep an eye out for errors on your washer – they might tell you there’s a problem with the shift actuator. Check your manual for help with specific error codes.
- Weird noises or vibrations: If your machine starts making strange sounds, it could be the shift actuator acting up.
- Check for damage: Take a good look at the shift actuator sensor. If you see any cracks, broken bits, or loose wires, that could be the source of the trouble.
If you notice any of these issues, don’t worry – replacing the shift actuator is a doable job that can get your washing machine back on track.

How to Replace a Shift Actuator
To get to the shift actuator inside your washing machine, lay it on its side and use a screwdriver to take off the back panel. Look at the picture above to find the actuator next to the drive belt. It’s good to snap some photos of the wires before you start so you have a clear guide when setting up the new unit. Changing the shift actuator is easy – just unplug the wires, unscrew the part, and put in the new one.
And if you want a really helpful guide on putting in a new shift actuator in your Whirlpool washing machine, check out the video below. It gives you step-by-step tips to make the whole process a breeze.
Faulty Drive Motor
The drive motor in your washing machine is meant to last a long time, but sometimes it can act up. If you think the motor is the issue, here are some things to look for:
- No motor activity: When your washer is in the sensing cycle, you should hear the motor running to spin the drum. If it’s silent, the motor might be the problem.
- Check the connections: Take a look at the motor and see if there are any loose wires. Loose connections can stop the motor from getting power, and then your washer gets stuck in the sensing cycle.
- Strange smell: If you notice a burning smell, your motor might be overheating and causing the issue.
If all this sounds a bit too technical or you’re not sure, it’s best to get help from a professional technician.
Problem with the Main Control Board
If your washer’s main control board goes wonky, it can send wrong signals or none. To determine if this is the problem, you can test it with a multimeter. If this feels like too much, don’t worry; just call in a pro to help you out.
Testing the Main Control Board
So, do you think there might be a problem with the main control board in your washing machine? No worries, let’s check it out. Follow these simple steps:
- Unplug your washer: Safety first! Make sure your washer is unplugged from the power source.
- Remove the control panel screws: Use a screwdriver to take off the screws holding the control panel.
- Take off the control panel: Lift off the control panel – it’s the front part of your washer.
- Locate the control board: Once the panel is off, you’ll see the control board. Take it out, too.
- Set up the multimeter: Put your multimeter on the lowest resistance setting.
- Connect the multimeter: Attach the multimeter’s leads to the terminals on the main control board.
- Check the reading: Your board is good if the multimeter shows 0 ohms or a number close to it. But if it shows a really high number or the infinity symbol, there’s an issue, and you might need to get a new board.
Activate Diagnostics Mode
Running diagnostics mode can be a lifesaver when your washing machine acts up. It gives error codes to pinpoint the issue, and it’s a good idea to do this before you start taking the machine apart. It saves time, trust me.
How to Get into Diagnostics Mode
Getting into diagnostics mode is easy. Just follow these steps:
- Turn the dial around once, a full 360 degrees.
- After that, turn the knob left once, right three times, left once, and right once.
- Watch the dials – they’ll start flashing. When they do, turn the knob to the spin cycle.
- Press the Start button and boom, your washer is in diagnostics mode.
For more troubleshooting tips, check out “Whirlpool Washer Not Draining – Easy Troubleshooting.”
Recalibrate Your Washer
If you’ve recently swapped out parts like the main control board or drive motor, your machine needs a little recalibrating.
How to Recalibrate
To do this:
- Go back to the first two steps of entering diagnostics mode.
- Turn the knob to the right, click by click until only the Rinse light is flashing.
- Hit the Start button, and let the machine do its recalibrating dance.
It takes a few minutes, but it’s worth it.
Verdict: Sensing Cycle Problem Resolved
If your Whirlpool washer is stuck in the sensing phase, don’t worry – you might be able to fix it without taking the whole machine apart. Check for common issues, and if it’s something more serious, you’ll need to figure out which part is causing the trouble – it could be the shift actuator, drive motor, or main control board.
Have you experienced this problem with your washer? Share your story with us in the Comments section below. Your insights could really help someone else going through the same thing.
Recommendation
How to Hook Up a Generator to Your House
Can A Portable Generator Be Converted To Run On Natural Gas?
Tips Before You Buy a Room Humidifier
Conclusion
In conclusion, addressing a Whirlpool washer stuck on sensing involves a systematic approach that ranges from simple troubleshooting to potential component replacements. By utilizing diagnostics mode, recalibrating the machine, and identifying faulty parts like the shift actuator, drive motor, or main control board, users can often resolve the issue without extensive disassembly. Sharing experiences and insights in the Comments section provides a valuable community resource, fostering a collaborative approach to overcoming common washing machine challenges. Remember, a methodical and informed approach can often save both time and resources when dealing with these appliance issues.
FAQs
Q: How long should a Whirlpool washer be in sensing mode?
A: The sensing spins typically last for 2 to 3 minutes before introducing water to the load. Subsequently, the washer briefly shifts the load, pauses to facilitate water absorption, and then resumes the water addition process. This sequence may iterate until the appropriate amount of water has been dispensed to the load.
Q: Why is my washing machine sensing but not filling?
A: Begin by assessing the water pressure to ensure it meets the required level. If the water pressure is satisfactory, consider cleaning the screens located within the water inlet valve hose connection ports. Should the slow filling issue persist, replacing the water inlet valve is advisable, as low home water pressure could be a contributing factor.
Q: What does it mean when your washing machine says Sensing?
A: The washing machine detects the load size and dispenses an appropriate amount of water accordingly. During a cycle, it is common to observe that the wash load is not fully immersed in water. This occurrence is both normal and essential to allow for proper movement of the clothes.
Reference
Whirlpool – Sensing Mode


