
Easy Step By Step Guide On How To Build An Outdoor Pizza Oven
It is great fun to build your own outdoor pizza oven and enjoy a classy pizza with your friends and family every weekend.
Building your own wood-fired pizza oven in your backyard is not at all a difficult task.
Building a backyard pizza oven comes with the combined pleasure of having pizza at your backyard by enhancing the look of your outdoor home area.
With this new outdoor pizza oven DIY, your backyard will look not less than the social mecca, and your close ones are going to spend their weekend at your home, especially the backyard.
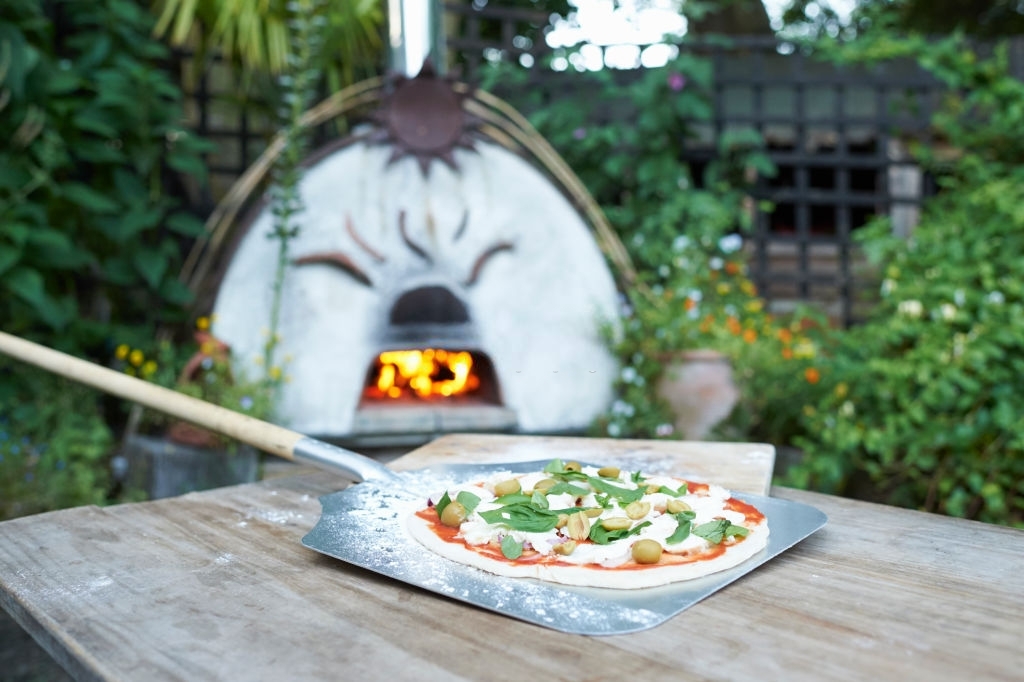
Pizza with the smoke of maple, oak, beech, birch, or ash wood will add up more flavors that are not even available at the huge chain outlets.
So what are you waiting for? Learn how to make your own outdoor pizza oven and complement your backyard kitchen or patio with this cute looking oven.
Step-By-Step Guide To Build Outdoor Pizza Oven In Your Backyard
Add this woodfired pizza oven in your backyard with this step-by-step guide.
There are several different designs of outdoor pizza ovens, and it can be a small clay pizza oven to a large concrete pizza oven.
The type of pizza oven you like to make depends on several factors like budget, availability of material, time, and size of the area you want to make your pizza oven.
Let’s learn how to build a backyard pizza oven and what are the things you require to make it.
Material and Tools Required
| Material Required: | Tools Required |
| Mortar 1 ⅝ inch Long Drywall Screws Quick Set Concrete 4-by-4 foot MDF or Medium Density Fibreboard 10 Gauge Steel Rebar Wire Mesh Flush Cut Decorative Bricks Scrap Cardboard Sand, 75 Pounds Plastic Sheeting Round Metal Ducting Pipe, 2 foot long and 2-inch Diameter Scrap Cardboard Plywood, OSB, or MDF Scrap Pieces, 18-by-18 inches Silicone Caulk, Of Any Dark Color Paste Wax or Mineral Oil | Rubber Mallet Cordless Drill Jigsaw Circular Saw Concrete Mixing Tub Water Spray Bottle Tape Measure Hacksaw or Metal Snips Hammer Carpenter Pencil Mason Towel Masonry Chisel |
Steps To Build Outdoor Pizza Oven
Follow these below instructions to make your homemade pizza oven in your backyard.
Step 1: Build Bottom Using The Mold For Oven Base
- The backyard pizza oven is a wood fire containing a pizza oven, which means it should be solid enough as well as have a fireproof base.
- You can make an oven base using the concrete pavers, but a rough concrete slab is great for making an outdoor oven base as it gives more flexibility to give it a more good appearance as well as make it the perfect size.
- Now make a mold using the melamine MDF. First, cut a large piece to make a bottom using a mold and cut the four sides of the oven.
- You can cut it into any choice, or I will recommend cutting 36-by-36 inches.
- Next, with the help of hacksaw or snips, you can cut 35-by-35 inches mesh.
Step 2: Build Sidewalls For Base
- Using a circular saw, cut the MDF wood pieces into 36 inches long and 2 ¾ inch broad strips. Attach sidewalls to the sides of the concrete mold with drywall screws.
- Next, insert the silicone for all the 90-degree angles into the mold. Smooth it using your finger.
- When the caulk gets cured, using a release agent makes a coat over the mold.
Step 3: Pour Concrete Mix Into Mold
- Create a concrete mix and pour it into the mold for about one inch.
- Put mesh on the top of concrete and then fill the complete mold with a concrete mix.
- Tap the sides of the mold using a mallet so that concrete will settle down perfectly.
- Take care of the concrete for two days so that it sits perfectly and moist it so that cracks do not appear.
Step 4: Remove Mold From Base
- After concrete gets set perfectly, it’s time to remove the sides of the mold carefully.
- For better help, first, flip the slab a little upside down and remove the mold pieces from the lower side.
Step 5: Put Lower Bricks On The Base
- To make a better concrete oven, you need to place the bricks to make a solid base. This DIY pizza oven has two adjoining areas, the backside of the doomed oven and the front side opening.
- For the front opening, you have to use two bricks, which has a gap in-between about 18 inches.
- Five bricks will make an arch, and they are placed on double-stack bricks on the front side, and the dome remains in a free-form.
- Start placing bricks and make an arch from the back side. Make a circle nearly in such a way that it touches both the sides.
- If needed, half the bricks using masonry chisel and hammer.
Step 6: Make Front Arch Form
- Make sides of the arch with two bricks and two stacks mortaring together.
- Next, put these double-stacked bricks about 18 inches apart and make the front side walls of the arch.
- Now make a form for arch by placing the 18-by-18 inch board on the edge of the stacks.
- Using the carpenter pencil, make a line from the inner side of the oven another sidewall.
- Remove it and then lay the second board below it. Now cut these both arches using the jigsaw simultaneously.
Step 7: Make Front Oven Arch
- Place these two cut arches forming an exact 3 inches gap between each other from oven sidewalls.
- Place support underneath the arch using a stack of the bricks. Now on the top of the arch, mortar these five bricks so that these form arch shape.
- One of the bricks should be placed at the center of the arch and look like a keystone.
- Next, nicely apply the mortar on each side of the arch and sidewalls. Make sure it is completely dry. Only then the arch form should be removed.
Step 8: Build Form For Rear Dome Of The Oven
- Once you have created the dome footprint like the way you want, now mortar the bottom to create a concrete base.
- When this process is fully dry, mound up the sand to make a form for building domes, use a mixing basin to mix sand using some water, and to stick to the form.
- With the help of hand, apply the sand in between the bricks. Build a half-sphere using the sand.
- Make sure to cover this sand dome using a plastic sheet tightly.
Step 9: Place Bricks On The Rear Dome
- Now place the bricks on the top of the brick dome. Mortar each brick and then add it over the sand dome, along with this mortar, the bricks on the neighbor.
- As you place the brick on the upper side, you can break down the bricks into halves as they fit on the oven. Make sure not to add bricks as you reach the top of the oven dome at the 6 inches of diameter.
Step 10: Build The Chimney For The Oven
- To make the chimney, place metal duct inside the top of the dome opening. Make sure that it does not reach down to the inside wall of the dome.
- In case the duct reaches the downside, it may hamper the process of making pizza, and it is difficult for smoke to draw out from the oven.
- After placing and measuring everything, you need to apply mortar to the duct to set it in place.
Step 11: Apply Mortar Over The Bricks
- In a tub, mix a large quantity of mortar and nicely apply all over the top of the pizza oven.
- Using a trowel, you can smooth the mortar with your hands.
- This mortar coat will give the oven a smooth and fancy round shape, as you imagined your outdoor pizza oven before starting the process.
Step 12: Set It For Few Days & Remove Support
- Now after mortaring the oven properly, now it is the time to leave the oven for three days to cure fully.
- Start by removing the arch form and oven bricks supporting.
- Now from the backside of the oven, it means dome area, remove the sand.
- While doing this, be gentle and careful so that your oven structure may not get damaged, especially while removing plastic sheets.
Step 13: Complete Oven Dry Process By Lighting Up Small Fire
- Before you begin to use the oven to make pizza or light up the fire at maximum temperature, you should first make small firewood in order to complete the oven-dry process.
- Initially, keep the flames and temperature of the fire low, as there are chances of brick and mortar to get cracks with high temperatures.
- With these steps, your outdoor pizza oven is ready.
Why Do People Have Outdoor Pizza Oven?
A wood fire backyard pizza oven is not less a nostalgic feeling that you may create with your loved ones.
However, more than that, a brick pizza oven is a great way to have super delicious pizza that our kitchen appliances do not make.
Heat in this brick and mortar pizza oven spread evenly and cook the pizza even by giving it the smoky flavor.
One of the secrets of having oven pizza is that it cooks the pizza dough evenly and makes a perfect chewy base. It bakes the pizza at 750 F to 1200 F and makes pizza within the minute.
Another reason that people like to build their own outdoor pizza oven is to have a smoky and savory flavor in the pizza.
The taste of the brick and mortar outdoor oven pizza is not at all achievable from the simple kitchen appliances.
READ MORE: Outdoor Bar Ideas
Remember – Important Thing To Consider Before Building Outdoor Pizza Oven
Before you start building your own backyard oven, make sure to ask and check the permit codes issued by the local county department.
You have to check whether there are any restrictions on building the backyard pizza oven and what the building and region code regarding this.
PRO TIP
In case you are living on the property of the Homeowner’s Association, you need to ask clearance before you begin the outdoor pizza oven building process.
Conclusion
If there are no such local department restrictions or you get clearance from the Homeowner’s Association, then this will be great for you to have your own brick oven baked pizza.
You can also organize backyard parties and invite your friends and family members to it. I am sure that your loved ones will enjoy outdoor oven pizza. Everyone likes to enjoy themselves at your place and make these moments remarkable for a lifetime.
This is the step-by-step guide, and I hope you get a better idea about how to build your own outdoor pizza oven.